

Excel 基础教学 | 快速添加浮水印在 Excel 页面
在分享 Excel 表格给第三方时,若有许多不容盗用的资讯,大家不妨可以透过加入「浮水印」的方式,就可以限制他人随意取用了。即使没有特别制作成浮水印的图片,也可以透过 Excel 内建的文字艺术师功能,创造以文字完成的浮水印。
然而,Excel 本身并没有插入浮水印的功能,不过我们可以透过在页首插入图片的方式,制造出浮水印的效果,详细步骤如下:
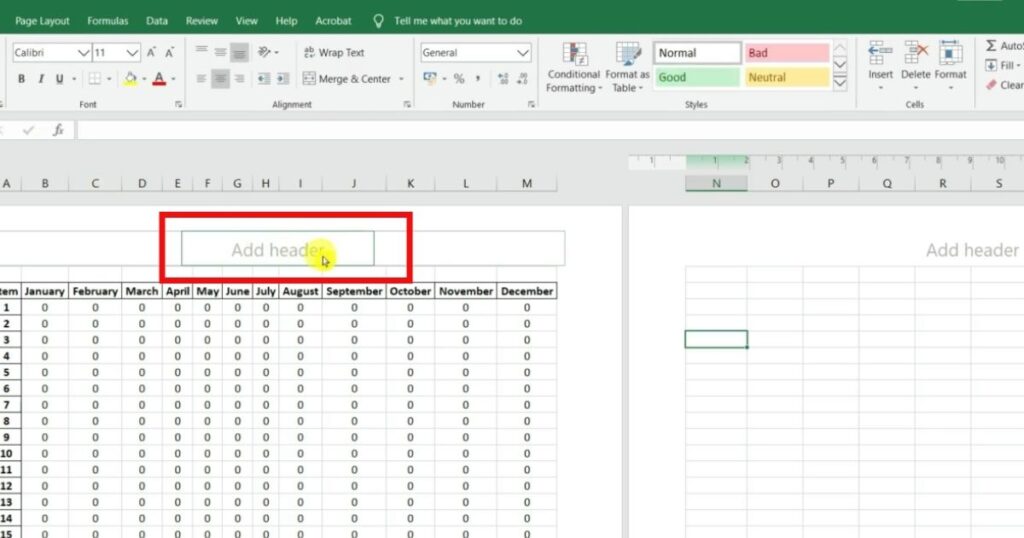
步骤(1):打开Excel Worksheet,点击「Add header」如图。
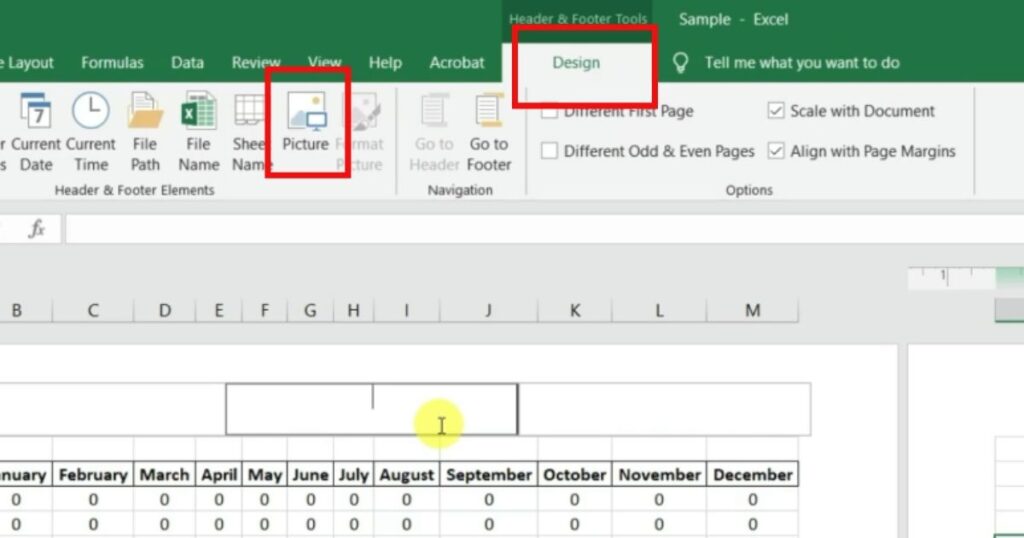
步骤(2): 在“Design”页籤中,点选「Picture」。
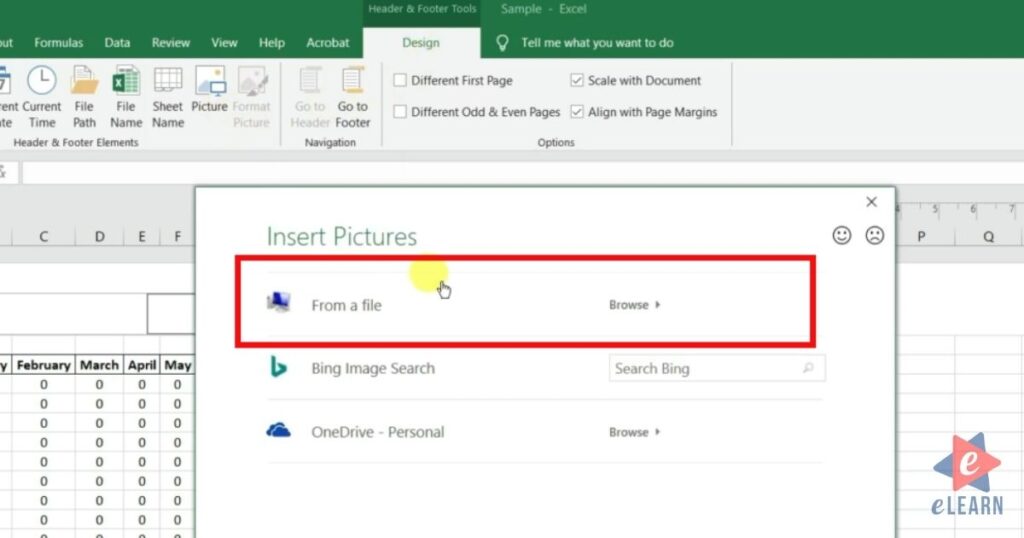
步骤(3): 选择想要成为浮水印的图片。
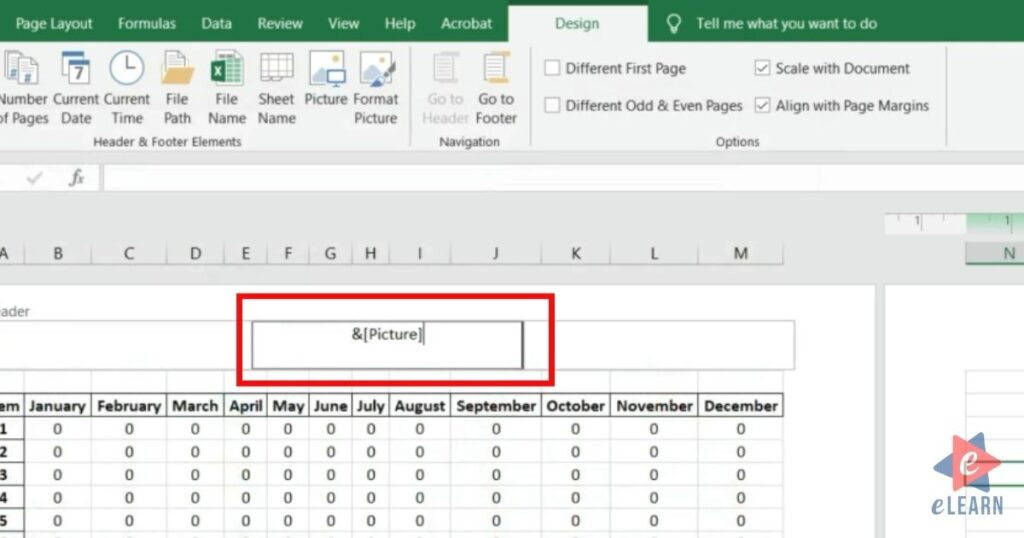
步骤(4): 插入图片后,页首的位置会显示 & [Picture] 的字样。
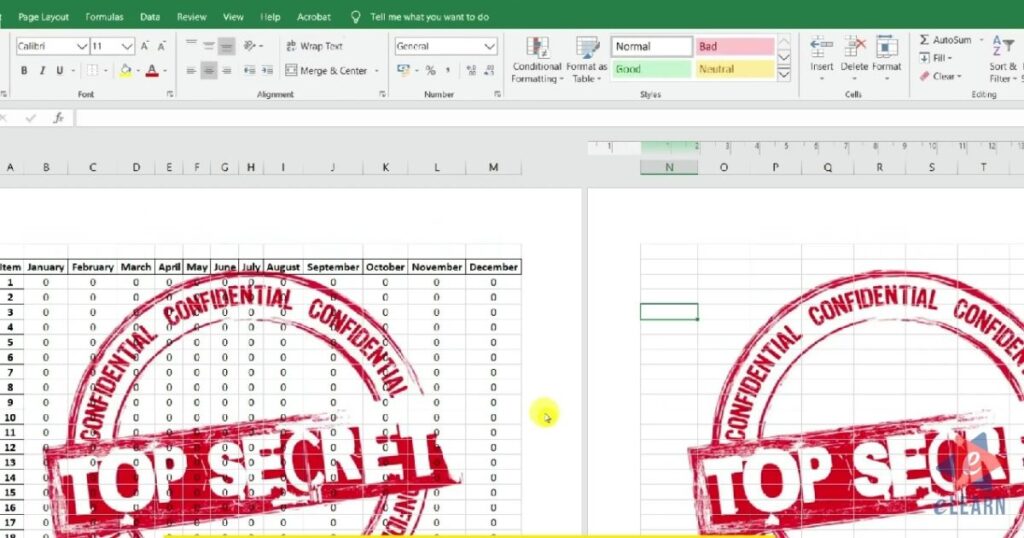
步骤(5): 点选页首之外的任意储存格,就可以查看插入图片的结果,这样就完成基本的图片插入动作了。
步骤(6): 通常插入图片之后,还会需要调整一下图片的大小、位置与颜色等属性,才会让整个版面比较漂亮。
为了方便大家更容易了解整体的操作,大家可以参考以下的视频:
经过以上一连串的调整之后,就完成一份有浮水印的 Excel 档案了,由于我们是将图片插入在页首,所以浮水印在列印时会自动显示在每一页当中。


